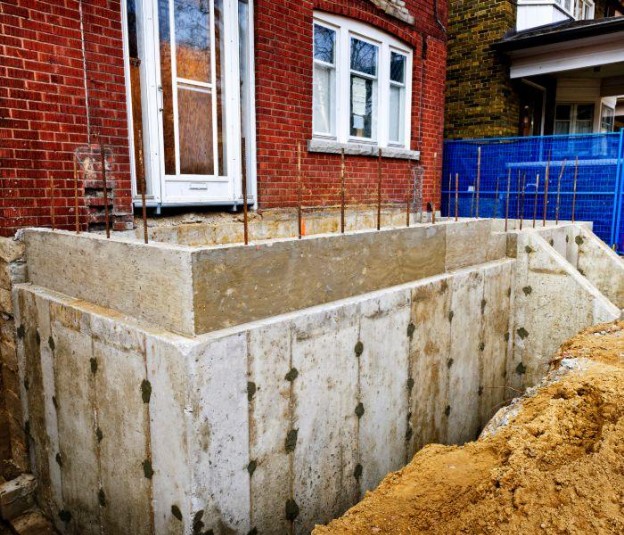
Water around a foundation may seem harmless at first, especially when there are no obvious leaks indoors. Over time, though, water in the surrounding soil can put pressure on foundation walls and seep through cracks, joints, or porous materials. Damp basement walls, musty smells, staining, and recurring moisture are all signs worth investigating.
For properties dealing with these problems, exterior waterproofing in Carmel helps manage moisture from the outside of the foundation. Instead of waiting for water to enter the basement and treating it indoors, the process focuses on reducing water contact with below-ground foundation walls. Installation often involves excavation, wall preparation, waterproof materials, drainage improvements, and careful backfilling.
Understanding these steps makes the project much easier to prepare for. Here is what property owners in Carmel should expect when work begins.
The Process Starts With an Inspection
Before excavation begins, the foundation and surrounding ground should be inspected. The contractor needs to understand where moisture appears, how water moves around the structure, and which sections of the foundation need attention.
Common warning signs include damp basement walls, visible water after storms, peeling paint, white mineral deposits, musty odors, and cracks where moisture appears. Outdoor conditions matter too. Poor grading, clogged drainage systems, short downspouts, and areas where water collects near the foundation may contribute to the problem.
A successful exterior waterproofing project starts by identifying these conditions instead of treating every foundation the same way.
The inspection also provides an opportunity to identify foundation damage before new materials cover it. Cracks or deteriorated sections may require repair before installing the waterproof barrier.
Excavation Exposes the Foundation Wall
Once the work area has been identified, soil needs to be removed from beside the foundation. Depending on the moisture problem and foundation design, excavation may extend down toward the footing.
This is often the most noticeable part of the installation. Excavated soil needs temporary storage, equipment requires access to the work area, and landscaping close to the foundation may need to be moved. Walkways, garden beds, shrubs, fences, or other outdoor features may also affect access.
Before digging, locate and mark underground utilities. Property owners should also discuss how landscaping and other features will be handled during the project.
Excavation is an important part of exterior waterproofing because the underground portion of the foundation must be exposed before workers can inspect, clean, repair, and protect it properly.
Foundation Walls Need Proper Preparation
Digging up the wall is only the beginning. The exposed foundation surface needs preparation before applying waterproof materials.
Workers may remove soil, loose material, damaged coatings, and debris from the wall. Cracks, gaps, or deteriorated areas may also need repair. A clean, stable surface provides a suitable base for waterproof membranes and coatings.
This stage may reveal conditions that were impossible to see before excavation. Hidden cracks, damaged masonry, previous repairs, or deterioration may become visible once the soil is removed.
Property owners should ask what foundation preparation is included in the original estimate and how crews will handle unexpected damage if they discover it during excavation.
Waterproof Materials Create the Main Barrier
After preparation, crews install waterproof materials along the exposed foundation wall. The exact system varies according to foundation construction, soil conditions, water movement, and the severity of the moisture problem.
A waterproof membrane or coating commonly forms the main barrier. Some systems also use drainage boards or mats that create a path for water to move downward instead of remaining against the wall.
Effective exterior waterproofing is about more than placing a coating over concrete. Water also needs somewhere to go.
The U.S. Environmental Protection Agency discusses this relationship in its moisture-control guidance. The agency recommends directing surface water away from foundations and designing below-grade drainage systems to move water away from structures.
EPA Moisture Control Guidance for Building Design, Construction and Maintenance
These principles show why waterproof barriers, drainage, and proper grading often work together rather than functioning as separate solutions.
Drainage May Be Added Near the Footing
Some projects include a drainage system near the bottom of the foundation. A perforated drain pipe may be installed beside the footing and surrounded with drainage material such as gravel.
Water that reaches this area flows into the drainage system instead of remaining beside the foundation. From there, it needs to move toward an approved discharge point or drainage system based on the property’s design.
Not every installation requires exactly the same drainage setup. Existing drainage, foundation style, soil characteristics, site slope, and local conditions all influence the final plan.
Ask the contractor where collected water will go and how the drainage system fits into the overall waterproofing strategy.
Backfilling Restores the Excavated Area
Once the waterproof materials and drainage components are in place, crews begin filling the excavated area.
Soil is returned around the foundation with care taken around newly installed materials. Protective drainage boards or other layers may shield the waterproof membrane during this stage.
Final grading also deserves attention. Ground that slopes toward the structure may allow rainwater to collect beside the foundation again. The EPA recommends planning surrounding slopes so surface water moves away from the building rather than toward it.
Landscaping restoration may happen afterward depending on the size and location of the excavation. Some soil may settle after rain, so it’s worth monitoring the area after the project is completed.
Expect Some Temporary Disruption
Foundation excavation is substantial work, so some disruption around the property is normal.
You may see digging equipment, piles of soil, noise, and restricted access to parts of the yard. The amount of disruption depends on how much of the foundation requires treatment and how easily workers can reach it.
Weather also affects the schedule. Wet soil or severe storms may slow excavation and backfilling.
Before work starts, discuss the expected schedule, equipment access, landscaping removal, cleanup, and final grading. Clear communication makes it easier to prepare outdoor spaces and understand what will happen during each stage.
Know What Happens Before Work Begins
A properly planned exterior waterproofing installation follows a series of connected steps. Inspection identifies the moisture problem. Excavation exposes the wall. Surface preparation creates a suitable base for waterproof materials. Drainage directs water away, while backfilling and grading restore the surrounding ground.
Knowing what to expect gives property owners a better foundation for asking questions, reviewing the proposed work, and preparing the site before installation begins. Moisture problems are much easier to manage when you consider the water source and the conditions around the foundation together.
If you are noticing basement moisture, foundation leaks, or water collecting near your foundation, Carmel Foundation Repair Experts provides professional foundation and waterproofing services in Carmel. Contact us to schedule an inspection and learn which approach fits the conditions around your property.